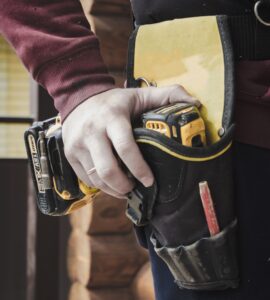
Regardless of the scale of the repair, it is critical to address a leak as soon as it appears. Finding the source of the leak is the tricky part. The size of the leak may affect how difficult it is to discover it; smaller leaks are more difficult to locate but can do the same amount of damage as larger ones.
The procedures below will assist you in determining the source of leaks and avoiding needless labor.
Locate the Tell-Tale Signs
Where do you think you could have a roof leak or window leak?
- Is there standing water in your living room?
- Do you get a whiff of mold when you pass past a specific location?
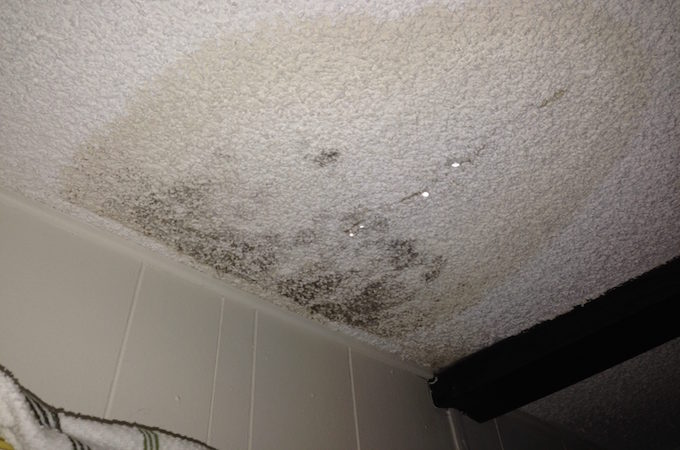
- Is there a water stain on the ceiling, perhaps?
This does not always imply that the leak is located immediately overhead. Because water may move nearly anywhere via the insulation and inner structure after it penetrates the roof.
Finding the roof leak, on the other hand, will be a lot easier if you know where to search first.
Check the Attic
Next, look in the attic. The cause of any roof leaks is most likely to be found in the attic, which is the area of your house closest to the roof.
If there isn’t enough light, bring a flashlight and look around the attic for any leaks or signs of dampness.
- Is there any mold, mildew, black stains, or moist spots that you can see?
- Or do you detect the odors of mildew, mold, or rot?
- Is there any rotten, broken, or decaying wood framing?
- Pay attention to any area that has discoloration or appears darker than the area surrounding it
First, do a general inspection. Look closely at any locations that show symptoms of wetness. If you don’t, you’ll have to take a closer look at the entire attic.
Check the Insulation
Now evaluate the attic’s insulation. Is it damaged or compromised in any way?
Look for:
- discoloration
- mold or mildew
- sogginess
If you spot anything like this, move the insulation aside and look behind it.
Check the Vapor Barrier
Between the attic’s insulation and its drywall lies a vapor barrier, which is a piece of plastic liner. Its function is to keep heat in and moisture out.
Leaks frequently appear on the vapor barrier, and any moisture or wet areas are easily visible there could even be water droplets visible.
Pulling all of the insulation away to get to the plastic liner, on the other hand, may be a lot of labor, remember to wear gloves if you do this.
As a result, it’s best to do this after you’ve discovered a faulty insulating part.
Check the Roof from Inside
Take a peek at the roof’s inside side now. If it’s covered in insulation, start by removing any sections that appear to be damaged. Otherwise, conduct a thorough spot check with your flashlight.
Look for:
- Damaged wood
- Stains
- Rot
- Moist spots
- Shiner nails
- Loose vents or plumbing
Moisture patches and rotting wood are obvious. Shinier nails and loose vents, on the other hand, need a bit more effort.
A shiner nail is essentially a roofing nail that has been lost. When roofers miss the rafters or planned framework and end up pounding nails into the attic, this is what happens. Shiner nails serve as water entryways for little quantities of water.
With your flashlight, you can spot a shiner nail. This will be especially simpler if it’s chilly outdoors since accumulated moisture will freeze over and turn the nail white.
Check all of the vents and piping that lead to the exterior as well. Check to see whether the seals on these are still intact. Over time, these regions may relax and allow moisture to enter.
Check Under the Roof’s Eaves for Evidence of a Roof Leak
It’s now time to go outside. Begin by inspecting the roof’s eaves for damage. Water might seep through the sides of your roof if the overhanging ledge is broken.
Flying items can cause harm to the eaves. There are also vents here that can lose their seal or become accessible to animals at any time.
- First, check for apparent damage, rips, or openings by looking up.
- Then get a ladder and look for any vents that may be there.
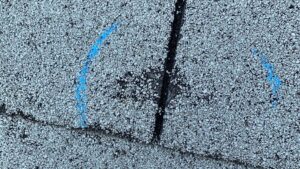
Check the Roof’s Surface
Get up on the roof if you’re comfortable doing so and check to see whether everything looks regular or alright. While don’t recommend getting onto your roof, we did make a ladder safety guide for homeowners. Anything that compromises the integrity of the shingles increases the chance of leakage.
Check the shingling for:
- stains
- lifting
- broken pieces
- gaps
- green or dark growth
Issues like this need to be repaired right away.
While you’re at it, examine the seals surrounding the rooftop vents and any protrusions such as the chimney or attic dormers to determine if they’ve loosened.
Spray the Roof with Water
Finally, you can spray or saturate the roof with water to see if any water leaks through.
Obviously, this will result in additional water entering your home, so it should only be done as a last option.
This will necessitate the assistance of a companion. One person should be checking for leaks inside the home while the other waters down the roof.
However, you can’t just spray randomly. This must be accomplished by flooding isolated portions of the roof.
Start by spraying the area closest to the source of your indoor leak. Alternatively, you may simply walk across the roof. Make sure to perform this section by section so you can pinpoint the exact location of the leak.
Lift up the shingles in that location once you’ve found it to determine if the underlayment and structure beneath are water damaged, moldy, rotten, or cracked.
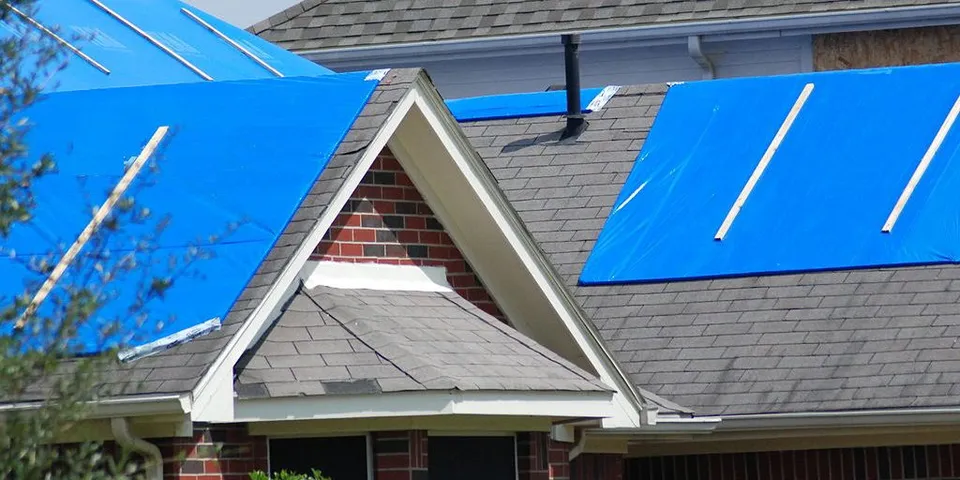
Get Your Roof Leak Repaired
Have you discovered the source of the leak? Things’s past time to get it fixed. Contact us and we’ll dispatch a crew to your location straight away.
If you haven’t been able to discover the source, simply ask us to locate it for you. We’ll conduct an inspection to determine what needs to be repaired and then get to work.
For almost 20 years, Midwest has been repairing roofs in Minneapolis. Thousands of other homes have benefited from our high-quality, low-cost roofing services. Likewise, we will do the same for you. Please contact us at 612-332-2744 or [email protected].