Famous for its durability and minimal maintenance, vinyl siding is highly favored by homeowners. However, even the most resilient materials can struggle under certain circumstances. It is crucial to promptly address any problems with your vinyl siding to prevent further harm and prevent pests from invading. This guide aims to assist you in learning how to repair vinyl siding, offering valuable tips and a detailed walkthrough for those who wish to handle the task themselves and potentially save money.
Causes and Consequences of Vinyl Siding Damage
Although vinyl siding is known for its durability, it is not impervious to harm. Here are some factors that may contribute to its damage:
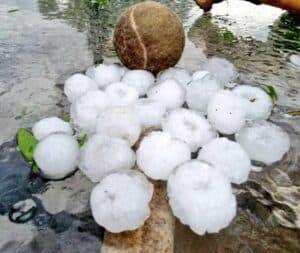
- Weathering: Prolonged exposure to extreme weather, such as severe temperatures or heavy precipitation, can result in the gradual deterioration of vinyl siding.
- Impact: Inclement weather, debris, or accidental impact from yard tools can result in dents or cracks on your siding.
- Insect Infestations: When vinyl siding is damaged or loosened, it can create an opening for insects to enter your home. This could potentially result in pests taking up residence inside.
- Mold and Mildew: Excess moisture on your siding can promote the development of mold and mildew. This can result in unattractive stains and possibly even structural problems.
Failing to address these concerns may result in more extensive and expensive repairs down the line. It is crucial to promptly address any damage to your vinyl siding to maintain both your budget and your home’s structural stability.
Repairing Your Vinyl Siding By Yourself
Don’t let fixing vinyl siding feel like an endless struggle. With the appropriate tools, materials, and a bit of patience, you can successfully revitalize the appearance and performance of your siding.
Pre-Repair Preparations
Before beginning the vinyl siding repair, it is crucial to prioritize safety and equip oneself with appropriate gear such as safety glasses and work gloves. Thoroughly assess the level of damage to gain a comprehensive understanding. It is also important to gather all necessary tools and replacement materials beforehand for a smooth and efficient process. Keep in mind that patience and thorough preparation are essential for achieving a successful repair.
Reviving the Siding
Use this step-by-step guide to successfully repair your vinyl siding:
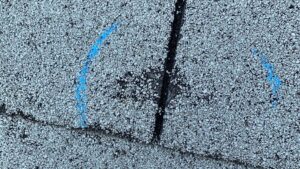
- Check the Damage: Conduct a comprehensive inspection of your vinyl siding to evaluate any signs of damage. Take note of cracks, holes, dents, or sections with missing siding. This assessment will assist in determining the extent of repairs needed.
- Prep the Affected Area: To fix small holes in your vinyl siding, caulk is the solution. To ensure it sticks securely, make sure to clean the affected area well. A microfiber cloth and warm, soapy water will effectively remove any dirt or debris from the damage.
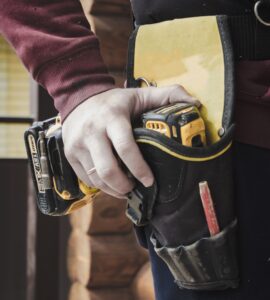
- Gather Supplies: Having the necessary tools and materials on hand is crucial for a successful repair. These items include replacement siding pieces, a utility knife, a zip tool, a pry bar, a hammer, nails, and color-matching vinyl caulk. Properly preparing beforehand will make your DIY repair experience much easier.
- Extract Damaged Siding: In order to eliminate the damaged siding, utilize a zip tool to release the panel above the affected area. Carefully insert the zip tool underneath the overlapping piece and pull downwards. Next, employ a pry bar to extract the nails securing the compromised panel. It is important to avoid causing any damage to the adjacent siding while executing this task.
- Prep the New Siding: To replace the damaged section, measure its length and cut a replacement piece with a utility knife. Be sure to match the profile and color of your existing siding.
- Install the New Siding: Insert the new piece into the gap created from removing the damaged section. Secure it in place with nails, ensuring proper alignment with the neighboring siding. Seal any gaps or seams using vinyl caulk that matches the color of your siding.
- Ensure a Secure Fit: Once the new piece is in place, ensure that it fits securely and make any needed modifications. The repaired area should seamlessly integrate with the remaining siding.
- Maintain and Clean: After the repair is finished, make sure to clean your vinyl siding to eliminate any dirt or stains. Consistent maintenance, including regular cleaning and inspection of your siding, can prevent potential damage in the future.
The Benefits of DIY Vinyl Siding Repairs
Taking on the project of repairing vinyl siding on your own can not only save you money, but also bring a sense of accomplishment. Here are some factors to keep in mind when considering a do-it-yourself approach:
- Cost Savings: Hiring a professional contractor for vinyl siding repair can come with a hefty price tag. However, taking on the project yourself means cutting down on labor expenses and only having to purchase the necessary materials and tools.
- Swift Repairs: By choosing to handle the repairs yourself, you can promptly address any damage. As a result, you can prevent small concerns from escalating into more significant issues that may ultimately require a full siding replacement.
- Boosted Home Value: Ensuring the visual and structural soundness of your home through vinyl siding repairs can greatly improve its attractiveness and value. A well-kept outer appearance is critical in making a favorable initial impact.
- Personal Satisfaction: The satisfaction of finishing a DIY project can be immensely rewarding, granting homeowners autonomy over their home upkeep and the opportunity to develop practical abilities.
When to have Professional Assistance
It’s important to note that repairing vinyl siding may not be suitable for a DIY approach in all cases. If the damage is significant, covers a considerable area of your siding, or results from structural concerns, it’s recommended to seek help from a professional.
In addition, if you lack proficiency in utilizing equipment such as drills or have concerns about working on tall structures for the siding repair, it is advisable to seek assistance from a knowledgeable contractor. These experts are equipped with the necessary skills and tools to tackle intricate repairs, guaranteeing efficient and accurate execution.
Additionally, consulting a professional may be necessary to maintain coverage if your vinyl siding is still under warranty. In such situations, entrusting their expertise is the best decision to preserve your home’s structural stability.
Summary
Vinyl siding is a popular option for homeowners looking for a sturdy and easy-to-maintain exterior. Despite its ability to withstand various environmental factors, it may eventually require repairs. Fixing vinyl siding on your own can be both practical and budget-friendly, as long as you follow proper procedures and precautions. Addressing any issues with your vinyl siding promptly can protect your home from further damage or potential pest problems.